What We Are Doing
We are going to make a custom mad circuit board, this process is also known as PCB etching, which involves toner transfer on to a blank copper boardand, then etching the unwanted copper away with ferric chloride and leaving the tonder transfer, thust you are left with your circuit board, WARNING ferric chloride is a corrosive chemical, so handle with care I also recommend doing this on a hot day it was a 30*c day when I did this, Ferric Chloride works best when it is warm if you are doing this on a cold day you need to keep it as warm as possible, what I normally fill a bucket with hot water and have the container of Ferric Chloride just breaking the surface of the hot water, do this with extreme caution and use a mast because it will generate some toxic fumes.
Parts Needed / Recourses
Bucket
Blank Copper Prototype Board
1mm Drill Bits
Isopropul Alcohol
Paper Towel
Thick Plastic Container
Kettle & Large Container
Baking Paper
Lazer Printer
Masking Tape
Photo Paper or Toner Transfer paper
Ferric Chloride
Plastic Twicers
Lacquer or Clear Spray Paint
Drill & Rotary Tool & File
Appropriate Safety Equipment Rubber Gloves, Mask and Appropriate Clothing
Software
Robot Room Copper Connection, you can download it from there offical website here or you can download the exact version im using here.
Kettle & Large Container
This will only be needed if you are using Photo Paper.
Lazer Prtinter
This will only work with a lazer printer and not an ink jet I found this out the hard.
Photo Paper or Toner Transfer Paper
I will be using photo paper because I have a lot of it laying around and is the cheaper option, you can also use toner transfer paper.
Ferric Chloride
Ferric Chloride is Corrosive so use with care and you will be fine also a good thing before useing, read the safety instructions usually visible on the side of the bottle or do a onlinesearch.
Plastic Twicers
These will be needed to move the board around in the Ferric Chloride or any other plastic tools will do.
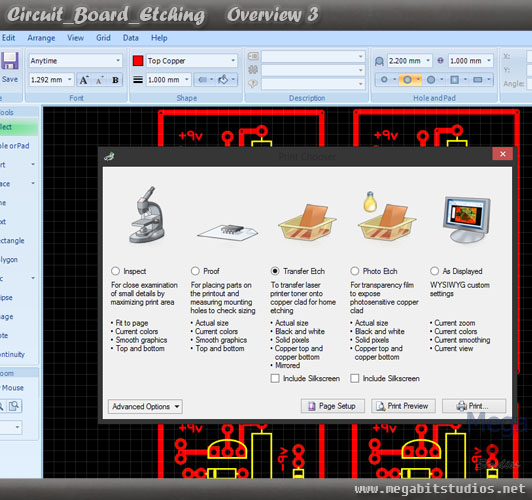
Designing The Circuit & Printing
First off you will need a program to design your Circuit I will be using Robot Room Copper Connection download and install it from the link above, this software is very easy to use I am not going to go in to great detail on how to use it but, I will show you everything you need to know to design a good board for etching and a few little tips to make life much easier.

Now put together your circuit diagram and you will have something like this.
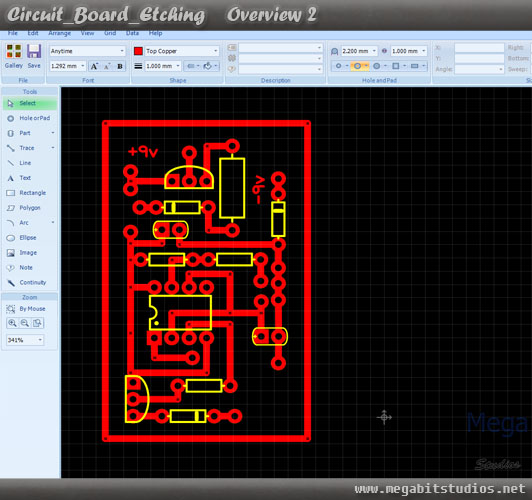
Now we have the diagram we want to prepare to print, now it's normally a good idea to have multiple of the same circuit on the same copper board in case when you are etching one doesn’t etch properly.
Preparing For Etching
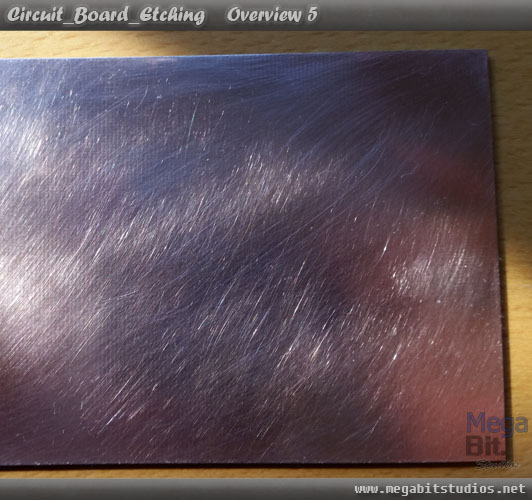
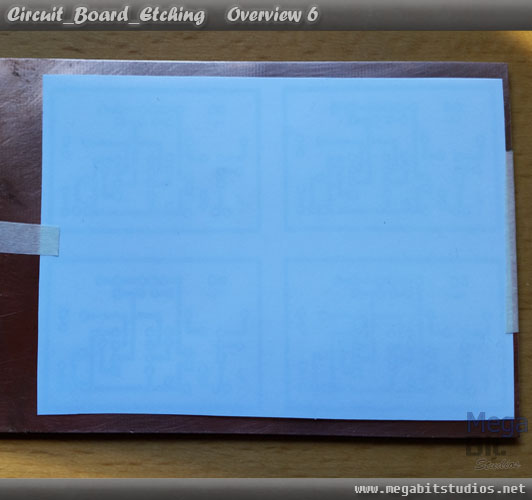
Now that we have the transfer printed out check that all the spacing’s are correct and all the components go in the rite way, then cut to size to fit the board, next you will want to prep the board for transfer use a piece of steel wool & isopropul alcohol and paper towel to clean to board thoroughly, once it has been cleaned and has dry stick the transfer to the bear copper near the centre with a small bit of masking tape.
Now the board is ready for some heat boil the kettle and put it in to the large contain enough so that it will submerge the whole board
(note: you will not need the boiling water for the tone transfer paper)
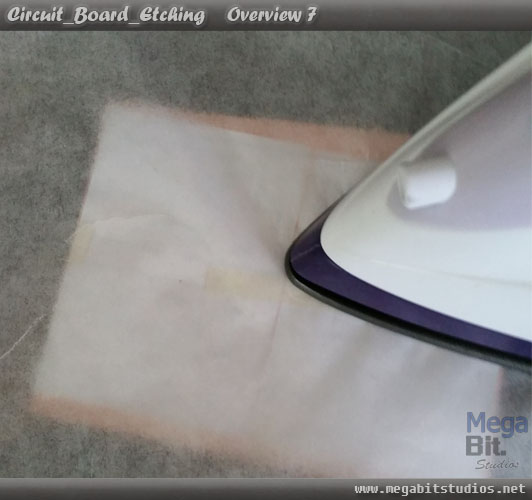
turn your iron on to the maximum heat setting, once it is up to temperature put the baking paper over the board and transfer then iron thoroughly for about 1 minute.
(Note: If you have the toner transfer paper at this point gently peal the paper off and the toner will be stuck to the board, do not put the toner transfer paper in the water the water is only for the photo paper method)
Pull the baking paper off and put the board straight in to the boiling water and let it soak until the water is cool enough to handle.
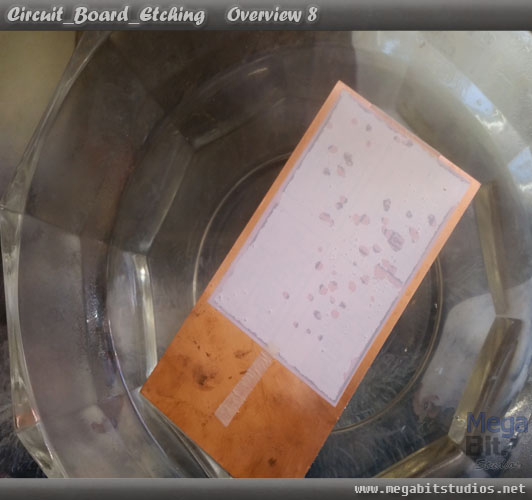
Once the water is cool enough to handle wipe the paper while in the water gently, after this slowly pull off the paper, resulting in the toner stuck to the copper board, Again gently clean off any of the excess paper residue and dry the board.
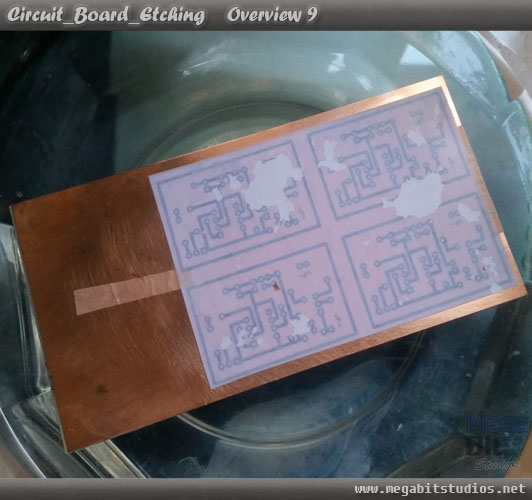
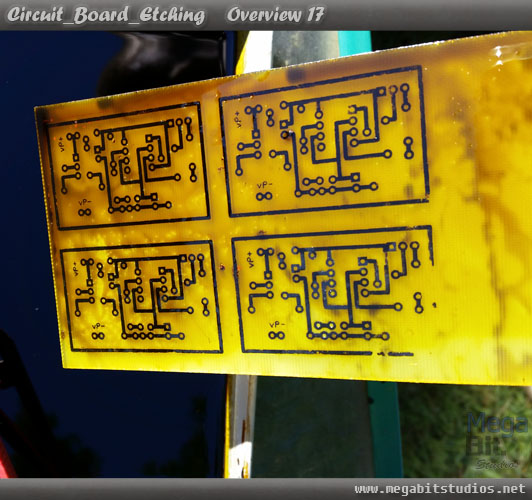
some time the transfer doesn't work 100% so this is why we did 4 off the one board in case this happens and if the etching doesn't work out. As you can see below 2 of the transfers did not transfer properly and 2 transferred are ok so in this case you would cut off the 2 that didn't turn out but im going to etch the whole thing.
Etching
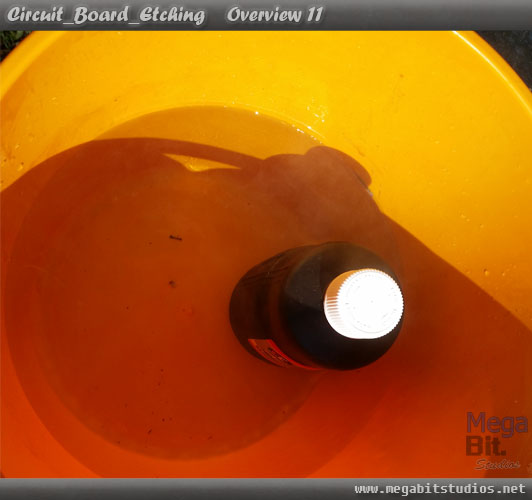
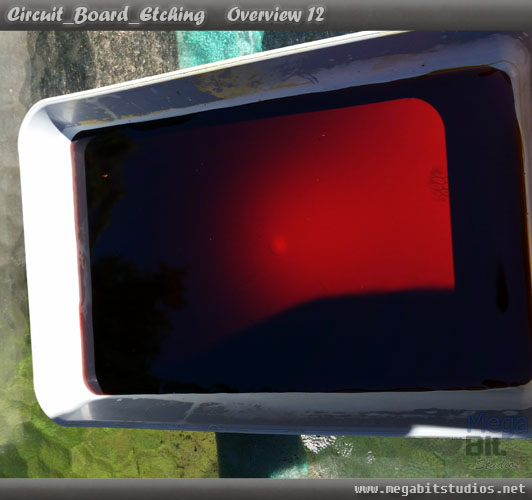
Ok now we are up to the etching process first boil some water and put the water in to a bucket and place the ferric chloride in to the bucket of hot water for about5 -10 min so that the ferric chloride will heat up.
(note ferric chloride will work better when hot or in hot conditions also use a mask the fumes it will put off are toxic)
now the ferric chloride is hot, put enough in to a plastic container so that the board will be submerge, place the board in to the ferric chloride, you will want to agitate the ferric chloride every now and again along with pulling the board out and putting it back in again.. (note make sure to be wearing the appropriate safety equipment)


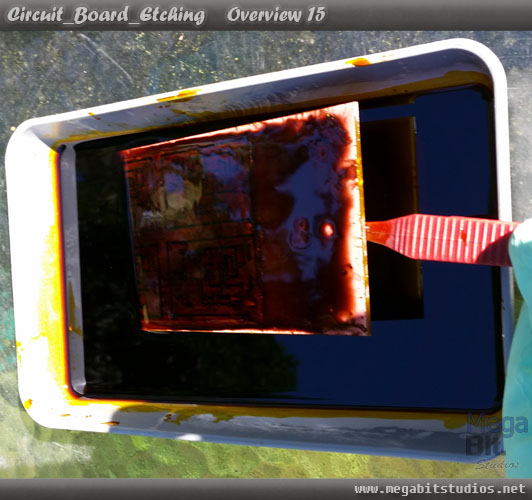
you will find after a few minis the board will go black this is good it means the feric cloride is doing its job and eating away at the copper.
(note: if you are doing the photo paper mothered after about 30Min / half way through take the board out and wash it to remove any of the left over paper stock and re submerge once it is dry)
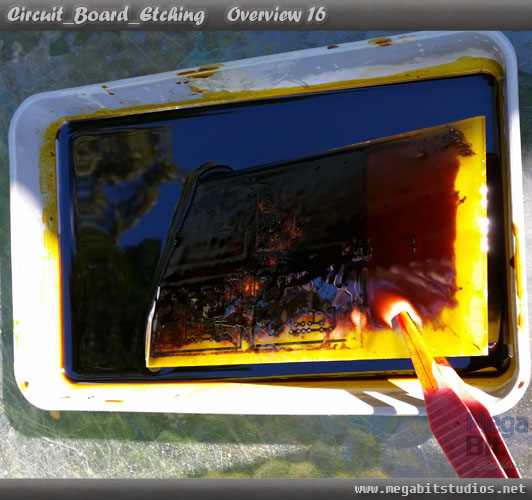
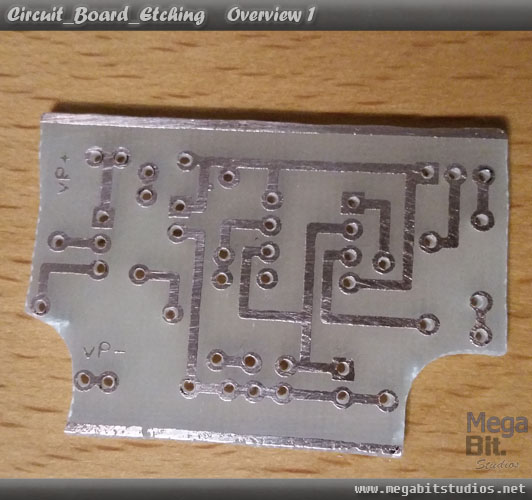
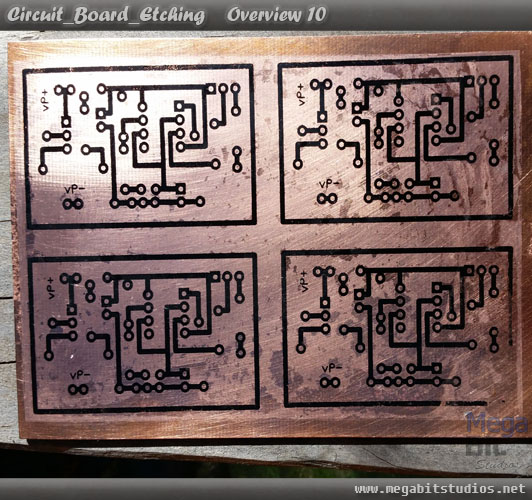
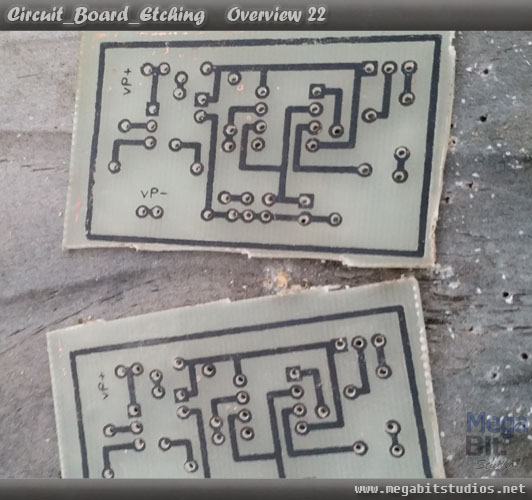
Now we can see that a some of the copper has been eaten away it may take 1 to 2 hours (this time will depend on how hot the ferric chloride is) to complete a whole board just keep an eye on it when you agitate and remove the board, once all of the unwanted copper has been eaten away it should look something like this.
Once you are happy with the board drain off all of the ferric chloride then clean thoroughly with fresh clean cold water.
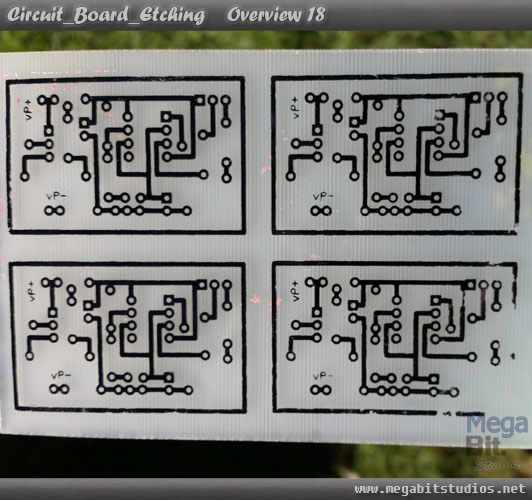
When cleaned you will have a nice circuit board to work with 2 of mine did not work out so well but 2 of then worked out perfect.
Cutting & Preparing The Board
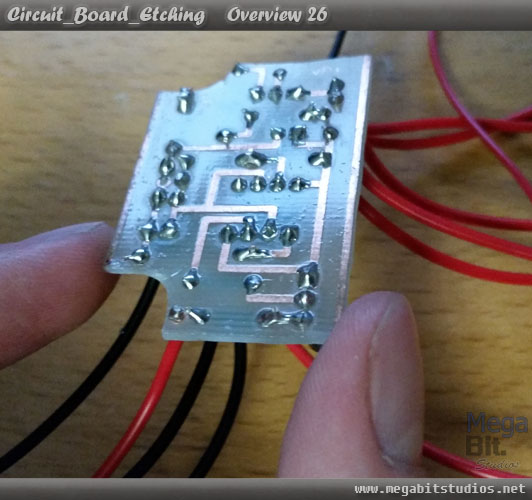
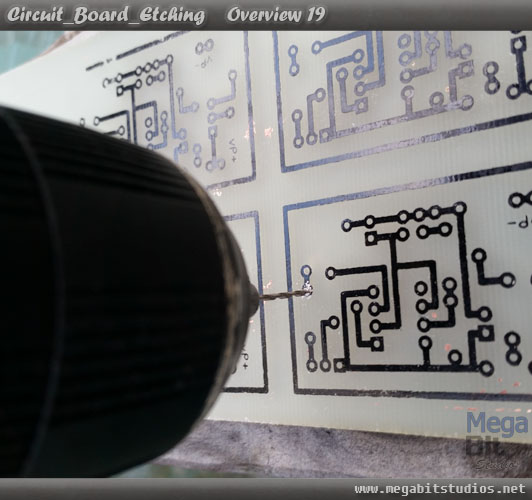
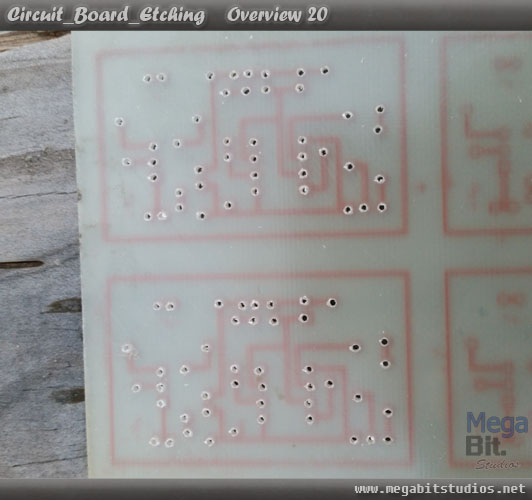
Ok now that we have a etched board we want to now dill out the holes for the components to go through the board grab the 1mm drill bit and start drilling out all of the of the pads on the boards.
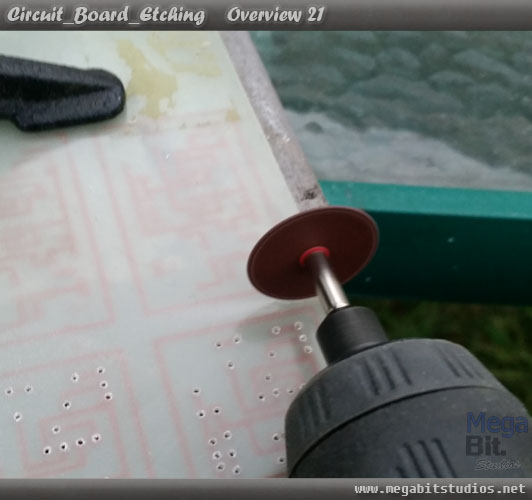
Ok now to cut the single board in to mutable and file them down to size and prepare them for the enclosure that they have to go in to.
The Home Stretch, Soldering & Lacquer
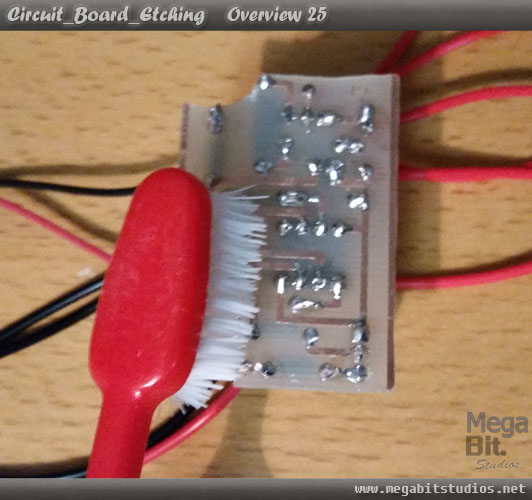
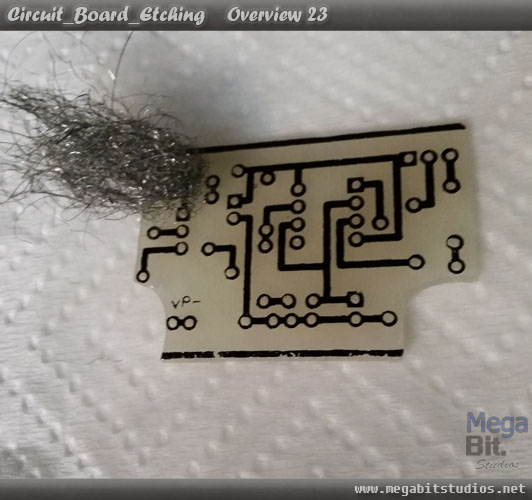
Clean all of the traces with a piece of steel wool and the isotopic alcohol until they are nice and shiny.
Solder all of the components to the circuit board if you used solder with flux you will want to grab an old toothbrush and clean it with isotopic alcohol, once it is dry spray the board a few time with the lacquer or clear spray paint, let it cure for 24 hours, and now you have your own Custom Circuit board.